Supplies:
Water based markers
An old CD (Thank you AOL)
Paint brush and water or a water brush
Smooth Card stock or Watercolor paper
Piece of paper towel
Optional: Sharpie, waterproof pen of stamped image that has been heat embossed using embossing powder. For my examples I used a stamped image and embossing powder.
Painting with markers is a technique I learned at a beginner stamp class at Stampin Cat Studio about eight years ago and it has come in handy time and time again. It's also a great way to let your kids paint on days when you can't bear a mess. Let's get started.
1. Start with your image, you can draw something with a waterproof pen as I did here:
or you can just start painting as you would with any water color picture.
2. Choose the color you want to use and scribble that color on the CD. Pick up some of the color with a wet brush and start painting.

The amount of water determines the intensity of the hue. This is the best part of painting with markers because you can have the "perfect" light green match for your dark green by using more water. This takes a lot of guess work out of your color choices. Here is an example of the color options from one light leafy green marker. The teal shades were made from picking up ink where a blue scribble met the green:

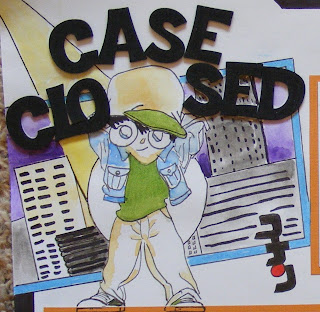
In this picture, the red in the cowboy boots is the same marker as the pink test line near the CD(sorry about the picture):

Let your images dry before using them and your done. See, I told you it was easy.
Tips:
* Some people apply a wet brush directly to their markers. This works but you don't have the same level of control over the color and you shorten the life span of your pens.
* You can also use a water based ink pad the same way. It would cost big $$$ to have as many colors of ink as a one dollar twelve pack of markers so this is not the option I prefer but go for it if you'd like.
* To make caucasian skin tones you are better off using a watered down brown than shades of pink. I use so much water with a brown marker that the paper barely changes color. It usually dries to a pale tone close to my skin color. Using brown also provides good shading options like this:

* This technique is really fun and once you get started you'll want to paint a whole bunch of stuff. I usually make up a sheet of images and color them all at once so they're ready when I am.

* You can mix colors on the paper. If your yellow is too bright go over it with a swipe of brown, the colors blend beautifully.
* If you add too much water or make a mistake, quickly blot up with paper towel. It won't remove all the color but it does take off a lot. This is also a terrific way to make clouds.
* When you're done, wash the CD in the sink. For stubborn dried on marker use a soapy sponge.
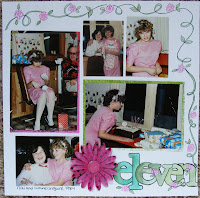
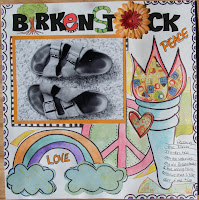
Here are some examples of projects I've used this technique on. In the past few posts I've also shown cards painted with markers. Click to enlarge:

 tutorial