Saturday, September 25, 2010

Papertrey September Blog Hop Challenge

Yay! Today is the Papertrey Blog Hop!
One of the most fun things about this hobby is the people you meet, whether in person or online, and the things you learn from them.  Now is your chance to show off any skills you might have learned from a fellow stamper, and perhaps even give them a little shout out to thank them for the inspiration they have provided.  Create a project using one of your favorite learned skills and perhaps after a little blog hopping, we will ALL learn some new tips and tricks and continue to pass on the love of this hobby!

The person I have been learning a huge amount from lately is Michelle Wooderson of Mish Mash. I've recently used her tutorial to make decorative clothespins, and I was inspired by how she stamps on shipping tags when I made these card sets.

This morning while trying to get a present for my sweet friend Lisa out the door in record time I needed to think of a way to make it special... FAST. Michelle's use of brown paper bags for packaging mixed with her shipping tags came to the rescue. I was able use my new Everyday Treats stamps for the main image and I was done in less than ten minutes.

(click to see it bigger)

Wanna see her present? It's okay, she already knows what's coming.


Wednesday, September 22, 2010

Owl Towels

Have you ever watched DIY Dish? It's great! The girls are sweet and so creative. Yay for local talent!

This week they had their first episode of their second season and the project was a cute owl pin cushion.  As you know, I already have a really cute pin cushion. What I need is more tea towels.

With a teeny bit of modification, I was able to use their darling pattern as an applique and now our tea towels make us giggle.


My favorite part:


I followed the pattern to cut the body as it makes two but instead of sewing them together I used one piece for each owl. Then I doubled the wings, face and legs.


For the features, I didn't use felt as these will be getting hard wear and lots of trips through the wash. Instead I used two pieces of white fabric per eye and it was thick enough to block out the stripes underneath and made the fraying all the better. Don't be afraid to substitute better suited materials to your projects and be sure to use what you have. In my case, I didn't have any orange for the beak but I did have flames. By fussy cutting I was able to come up with a perfectly adequate beak color. The black in the eyes came from a birds belly on a large pattern. No one will ever know and you'll spare yourself a trip to the store.


Just a tip, I know you're not as dumb as I am, but remember your legs need to be double thickness so they can be stuffed. I accidentally made them single-ply... twice. Oops. This was the first time I'd tried paper piecing (the sew and tear quilting technique, not paper crafting) and it's AWESOME. Very satisfying with all the rip and reveal excitement.

Here's one last look at my love birds:


I'd categorize this project as intermediate or motivated beginner. Five stars for design and clear instructions.

P.S. In case you're wondering, no, I didn't have a lobotomy over night. Yes, these are "cute" but they are also very funny. And I'm all about the funny. It's not like I appliqued kittens... *grin*

Tuesday, September 21, 2010

Wrinkle Ribbon and Tips for Card Sets


Do you lie to yourself? For example, do you keep a can of olives and a bottle of good vodka in your pantry in case you need to throw an impromptu cocktail party even though you've never thrown a cocktail party, impromptu or otherwise in your life?  Or how about, I'll only eat one. LOL. I sure do.

When I decided to make my own wrinkle ribbon I sold myself on the idea of me measuring out the exact size piece I needed, coloring it to the perfect shade to match my card or layout and ... wait for it... never having to buy, or more importantly store, ribbon again. For the remainder of time.

Yeah... that didn't go so well. I made a piece that was properly measured and dyed to match. Good, right? Then, like a thirsty man in front of a bank of Slurpies, I lost all self-control and did this:

(You really should click on this one. It's so pretty BIG)

Each piece is about three yards... so much for make as I go, perfectly matched, nothing to store... But they're so pretty! I love them so much.

To justify this ribbon frenzy I sat down with the latest CPS sketch and made a set of cards:


I'm on a kick where I want my cards to be fairly mailable (no need for padded envelopes), not too time consuming and ones where the effort is appropriate to the recipients appreciation. I know, that sounds kinda nasty, right. But it's not. If I spend three hours coloring, stitching, distressing, adding little beads and ten dollars worth of Primas and then send the card to a non-crafter they probably will be a lot more interested in the words I write inside then the very deluxe outside. Scaling back a bit isn't scaling back your love. It's just an appropriate response and you'll buy yourself a little time. Here's some tips when making card sets for non-crafters:


1. Don't spend too much time stitching and inking. Most people won't notice if you don't. Most folks don't know what inking is. Seriously. On these, I just inked the outside edge once the strips were stuck together. Saved a bundle of time.


2. Try to keep the cards fairly flat. Nobody likes paying an extra dime in "lumpy tax". Yes, I failed at this. The ribbon is not flat. 


3. Make all-occasion or birthday cards. Most folks will use them. 
Talk like a Pirate Day cards or Earth Day are fun but people forget to use them.


4. Use paper lines to your advantage. No one will think less of you if you don't mix lines. I promise. The paper companies make matching stuff for a reason. Double-sided is even better. For these cards, I cut a strip and then cut it in half and turned one over. Easy matchy, matchy, goodness.


5. Keep your elements simple and consistent for a coordinated set. Here I used stamped tags, ribbon and the same sketch.  


6. You get big points for packaging but it doesn't need to be complex or expensive. One of my favorite ways to give card sets is in an altered lunch bag. For this one I cut the bottom off in my paper trimmer and then sewed the bottom closed. Add a piece of ribbon and you're done. Lunch bags cost about two cents each. Frugal gift wrap at it's best and the gusseted sides leave lots of room for cards and envelopes.


7. Before you put your cards away in your gift closet, tuck a little tag under the ribbon (or in the bag). Then when the time comes to give your gift all you need to do is write on the label.

And finally, make sure you're having fun. For me, I like a challenge so I make rules for myself when crafting sets. Last night my rule was I could only use scraps of paper (no new sheets) and I could only use stickers etc. that were already used (like I'd added the other 1/2 to a layout ). I also had to use stamps that had never seen ink. In this case mine were the Stampin' Up ones and the Bo Bunny tree.

Friday, September 17, 2010

Popcorn Post

I love popcorn in all it's many luscious varieties. Back in Canada my favorite flavors were Dill Pickle, Pickled Cowboy (half ranch/half pickle) and the always awesome Chicago Style (half carmel/half cheese). Do you have a favorite flavored popcorn? Is Kettle Corn more your style or pure straight up butter salt?

We were all in a pretty nasty funk yesterday. Three of us are getting sick, I've been falling a lot so pain has been a constant shadow... ugh. The best way to cure a funk is to drop the 'k' and have 'fun' instead.

Making fancy popcorn certainly qualifies and the boys could participate in most of the steps.

The first (spoiler alert: AND BEST) flavor we made was Cinnamon Bun popcorn. Wow. I used THIS RECIPE from Our Best Bites with a few changes:


We made double the popcorn and used about one and a half times the amount of popcorn called for. Like frosting, I prefer my caramel corn to be lightly candied, not coated in a thick shell. We also omitted the pecans (adding more popcorn to make up the difference) as I was out of them after making Chocolate Beet Cake with Coconut Pecan Frosting.


You might know this recipe already as "Jello Popcorn". Yummy! This stuff turns me into a sticky eight year old. It's so awesome. Again, we added a lot more popcorn as I like to see some plain spots.

Inspired by these yumsters,


We drizzled vanilla candy melts over the cooled candy popcorn and the marriage was the most amazing Strawberries and Cream extravaganza... stop me, I'm gushing again.


Not wanting to leave savory out, we mixed up a batch of Garlic Parmesan Popcorn. My only mod was that we added a pinch of bacon salt to rev up the flavor. It was okay. The taste was very nacho-like. It was a bit too mild for our taste and wasn't very "WOW". We're going to add a little of this and a little of that,  pop it in the oven again and see if we can save it.

Remember that funk? It ran away with it's tail between it's legs in the face of all this:


Huge gooey thanks to Foodwhirl for Spotlighting my Cupcakes in a Jar and Chocolate Cake.

Thursday, September 16, 2010

Dia de los Muertos Dish Towels

My Day of the Dead preparations are ramping up as the air gets crisp and the leaves begin to turn. YAY!

(Click images to see a close-up)

First Stop: Dish Towels. I'm trying to inject a little more personality and style into the practical day-to-day aspects of our home; and what is more practical than dishtowels?


I've never appliqued before so I had no idea what to expect. In short, it's fun but sort-of slow work. Kind of like coloring in a detailed stamped image with Copics.

When the dishtowels looked like this: 


I called them done and started taking pictures before they set to work mopping up spilled cacciatore.

The boys had a different impression entirely.

Boys: So how are you going to embellish them?
Me: I'm not, they're done.
Boys: Come on mom, you've gone this far...make them special.
Me: Do you know how many times these will be washed???
Boys: How 'bout ric-rac?

*sigh*


Since I'm not a sewist, I'll spare you the tutorial. All I did was cut out cute images from fabric making sure to leave a border around each shape for fraying. Then I pinned them down - skeleton hands are teeny - and sewed very slowly around the perimeter of the image. My only advice is to pin, pin, pin and pin some more. When you think you've used enough pins, add a couple.

Wednesday, September 15, 2010

Rich Chocolate Beet Cake with Coconut Pecan Frosting

There were a few requests for the recipe I used in yesterday's Cupcakes in a Jar so I thought I'd share it. Please excuse the less-than-awesome pictures. Also, the one cake I photographed kind of went all loose and gooey because it was 8 gajillion degrees out and I was being stubborn about air conditioning.

Tip: Refrigerate this cake!


Chocolate Beet Cake
1 can (15 oz.) whole beets, drained (save juice)
1 1/4 C sugar
3/4 C oil 
1/4 C apple sauce (if you don’t have apple sauce, use 1C oil)
1/2 C juice from beets
3 eggs
1 tsp vanilla 
3TBL cocoa
1/4 tsp salt
1 1/2 tsp baking soda
1 3/4 C flour
3 squares (1 oz. each) unsweetened chocolate, melted (if you don't have chocolate onhand you can substitute 3 level tablespoons unsweetened cocoa powder and 1 tablespoon butter, margarine or shortening or oil for every 1-ounce unsweetened baking chocolate.)

Grease pans. I use a bit of parchment in the bottom too, but skip this step if you like to live life on the edge :-)


Sift together salt, baking soda, cocoa and flour. Set aside.


Place beets in blender jar and puree. Add sugar, oil, applesauce and beet juice to beets and blend. Add eggs and vanilla. Blend well. 

Pour the beet mixture into a mixing bowl and add the dry ingredients. Mix well on medium speed for approximately one minute. 

Stir in melted chocolate. 


Pour batter into two greased and floured 8- or 9-inch round cake pans. Optional Step, sprinkle batter with mini-chocolate chips for flavor and texture boost. Don't panic that it's an icky shade of fuchsia, if you look at the "after" pictures, it looks like normal chocolate cake once it's baked.


 Bake at 350 degrees for 25-30 minutes or until a toothpick inserted comes out clean. Let cool. Completely. (I mean it, if you don't you'll have a big mess like my cake above. Don't say I didn't warn you *grin*)
German Chocolate Frosting
1 C evaporated milk or half n half
1 C white sugar
3 egg yolk, beaten
1/2 C margarine or butter
1 tsp vanilla extract
1 C chopped pecans
1 1/3 C flaked coconut
In a large saucepan combine evaporated milk, sugar, egg yolks, margarine and vanilla. 

(Ew!)

Cook over low heat, stirring constantly, until thick (about 12 to 20 minutes, depending on elevation). 


Remove from heat and stir in pecans and coconut.


 Cool until thick enough to spread. You can speed this step up by sitting pan in bowl of ice cubes and stirring constantly.


You're going to have to imagine this part going well... it was REALLY hot in the house so the frosting was sloppy. Sorry.

Place one cake layer on serving plate. Spread with 1/3 frosting.


Top with second cake layer and spread with frosting. 

Some people just frost the top and let it run down the sides, others frost the whole cake. You can also use a dark chocolate frosting on the sides and German Chocolate (coconut pecan) on the top. 


Voila!


For cupcakes in a jar you just layer unwrapped cupcakes and frosting. I put an additional spoonful in the bottom of the jar because when it comes to coconut pecan frosting I firmly believe more is better. 

P.S. This is in direct opposition to my usual less-is-more opinion about regular buttercream frosting.


Tuesday, September 14, 2010

Cupcakes in a Jar

In honor of International Cupcake Week I thought I'd make cupcakes in a jar as a treat for the family. We always pack a lunch when I go writing on Tuesday nights and Chris and the boys run errands so these seemed like a great portable dessert - and yes, I have heard of cookies. I'm just not very good at making them :-)

Aren't they cute! They're also unforgivably feminine, but it's a jar of cupcakes... my little macho men can deal.


I love that we can reuse everything but the forks. We can probably even reuse those... I wonder if they're dishwasher safe? Thoughts?


Friday, September 10, 2010

Fun at the Utah State Fair

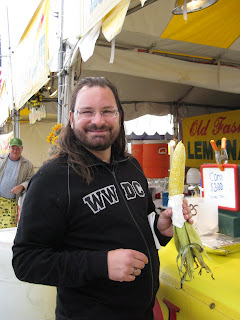
Full Disclosure: Last night my dinner consisted of two cobs of roasted corn and one and a half candied apples (one red, 1/2 a cinnamon). This can only mean one thing - Fair Time!


Yeah... that was sort of piggy of me, but compared to the chocolate covered deep-fried bacon eaters, I don't feel so bad.

Uh... ew!

Please avert your eyes if tooting your own horn is offensive to you but...

I GOT RIBBONS!


But they didn't like this one:


(Which is totally okay because I love it)

We all had an awesome time! The kids ate and rode rides and ate some more. 


And Chris and I hung around the corn booth. LOL. J/K


We also got our Psycho Brayden with flash picture. What is this you ask? Every year I go to take a picture of B when he's finally tired enough to sit down and eat and he looks like a psycho in a nasty with-flash picture. See:


Don't believe me? Here's last years:


Okay, I'm sure I've bored you all plenty. Thanks for looking at my fair pics. I'm already excited about going again next year :-)