Showing posts with label planner. Show all posts

Thursday, January 16, 2014

Art Journaled Planner Page


The first prompt for The Documented Life was your front door. 

Most people photographed or drew front doors (real or imagined) but I really wasn't feeling it so I journaled about my front door


I hope the page evokes a feeling of growth, change and awakening.


Other planner posts can be found HERE.

Saturday, January 11, 2014

Daily Planner for 2014 - Part Three: Closure


Part Three of this series is: Closure

The moleskin planner comes with a black elastic that wraps around the book from top to bottom. While that would be absolutely wonderful if I was using my planner in a traditional way, it's unusable with the tabs.

All that prettiness gets crushed and over the course of the next twelve months I think the whole thing would have torn apart.

So my first (brave) step was to tug assertively on the band and sure enough it popped right out.

Ha! 
Can you imagine my planner strap not getting an assertive tug now and then if I was keeping it? 
Would have broke for sure.

There was a little tiny black bit where I hadn't gessoed the cover that was easily concealed with a dab of paint.

The covers on the moleskine journals are made of a nice sturdy-but-flexible material so I took some hand dyed seam-binding ribbon made a loop and held it down with the plastic-y-est washi tape* I owned. I hope the washi will provide added reinforcement as any closure has to deal with a lot of force and wear and tear

Then I ran it through my sewing machine, back and forth, a whole bunch of times until it felt extremely secure. 

I made the ties extra long as I know this book will likely be twice the size once I add in pictures, ephemera and such. They look very pretty when tied closed. 

It's only been a week and a half but it's showing no stress or wear at all. 


This is part three of a three part series.


*Note: isn't it weird how washi ranges from low tack masking tape that's nearly translucent to plastic-like high-tack tape? I love the traditional masking-tape low tack stuff and despise the sort that you get from companies like the Smash! stuff. Ugh.

Friday, January 10, 2014

Daily Planner for 2014 - Part Two: Pages and Tabs


Now for the inside, the pages and tabs.

Note: This is a three part series, CLICK HERE to see 
Part One: The Cover

I heard about the altered moleskin planner project when Roben-Marie Smith posted about her group   Art to the 5th and their planner  The Documented Life Project.  It looked crazy-fun but I knew I probably couldn't just figure out all the inserts and such myself so I also signed up for Lorraine Bell's mini-class, Journal Play which is limited in scope to building this planner. I LOVE classes that are focused like that. No tangents, no wandering off. Just getting what needs to be done, done.

Just to clarify, you can participate in The Documented Life project using any notebook at all and you don't need the class. I just thought it would be fun to try it as the creators intended.

For the inserts it was suggested that you use watercolor paper but you could also use any ephemera you liked. As a long-time mixed media maker I had scads of painted backgrounds just waiting to be used so I cut them down to fit into the journal.

One word of caution I've figured out the hard way. If you're using all sorts of random project in a journal you need to do a bit of detective work and remember what the background was made with. My first insert had lovely bright circles strewn about and it turns out they were pastel. So whenever I applied heat it melted and I couldn't write over it. I love a challenge but it was a little time consuming and I'd probably steer clear of pages with pastel in the future.


Here's a close up of an insert with a failed project on it. The bunny was cute enough so I saved that bit.


For the tabs, the instructions said to use a tab punch and a laminator. I don't have either so I made due with what was on hand.

I found a great downloadable sheet of butterfly tabs  and printed it on card stock. I cut the tabs apart in rough rectangles and then glued gelli-printed paper to the back (the unprinted side) cut them out, with scissors, along the printed lines. Then I typed the months, cut them out and glued them to the gelli print. Next I 'laminated' them with packing tape. To attach them I ran them through my zyron sticker maker as I still had adhesive left from Christmas card making. But you could use any adhesive or even staples.
 I love how it turned out.  So bright and cheerful!


And here is the journal filled with 52 additional pages perfect for art making.


Thanks for the visit. Tomorrow we'll be talking about closures and how to keep all that loveliness contained.


Thursday, January 9, 2014

Daily Planner for 2014 - Part One: Cover


For 2014 I was interested in consolidating my embarrassingly numerous art journals, planners, notebooks, diaries and whatnot into one place. It's not that my family doesn't just love having my book-crap on every available surface but it was getting ridiculous. And we've been in a down-sizing frame of mind lately so this seemed to be another step towards that goal.

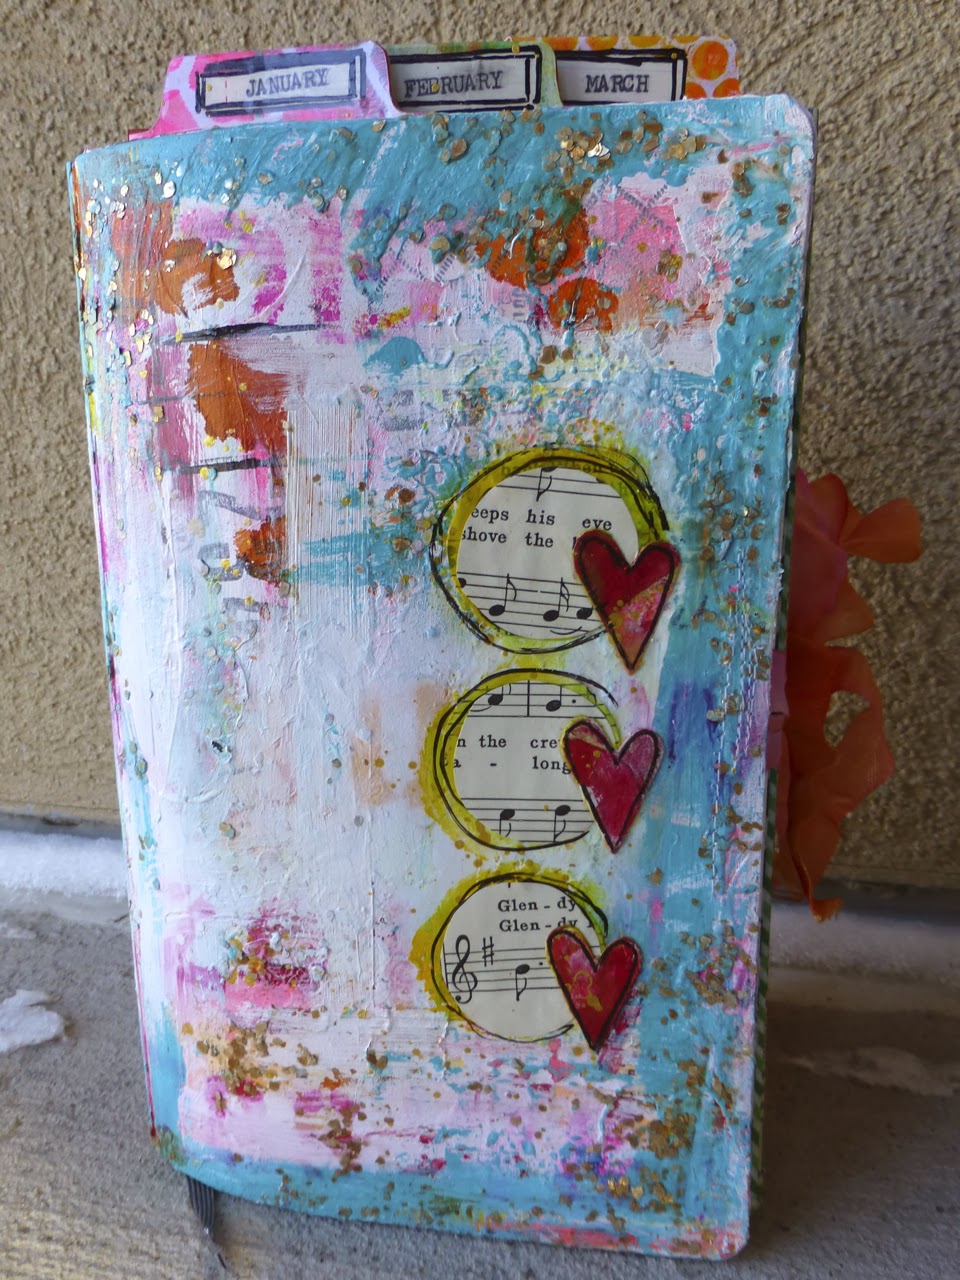
This used to be a plain black, skinny, wimpy looking Moleskine Daily Planner. 

Can I just say how flat and pathetic that thing looks. I had serious doubts I'd be able to fluff it up and make it a big colorful fatty. But, as the spoiler-y pic above proves. It happened. 

To make the cover I committed many crimes against my art supplies. Most are probably not repeatable. Sorry.

For starters, gesso. Everything starts with gesso and I spread that stuff on thick and unevenly. IMHO, evenness is yucky when you're art journaling.


Then I added paint, stamping and stenciling with Dylusions spray, some pen work (just a little as it's really not my thing) and to be honest it looked nasty. Like someone had taken a class and they followed step one to step two to step three without even a hint of inspiration or personality. 

I wish I'd taken an 'in progress' shot or three so you could see it. So terrible.


Deciding the whole thing was a lost cause anyway; I employed a favorite technique of mine. 
I pulled out my trusty heat gun and cooked all that acrylic paint until it bubbled and lifted off the gesso in big irregular sections. Then I scraped the loose mess with a credit card revealing all sorts of gorgeous layers. Now we're getting somewhere.


Next I rubbed teal paint around the perimeter of the book and scraped it down the page with a credit card. This was necessary as I'd dripped some red ink that ended up looking like a poorly managed massacre. It was hideous. The teal covered it up exquisitely.


And because I love some hard-wearing sparkle I scraped on some Large Gold Mica Flake Gel (golden) with a palette knife. Then I let the whole thing recover quietly, undisturbed, overnight so all those layers could cure and settle. 

The next morning all it needed was a little book paper, some punched mixed media hearts and some doodling. 

Confession: The first book paper circles were green, hideous. So I added yellow over top to punch them up and it looked even worse. But the hearts were on… what to do. 

So I carefully peeled up the heart and Mod Podged plain hymnal paper overtop the green/yellow ones and stuck it all back down. It made a lovely yellow border that I'm totally thrilled with. 


I think 90% of art-journaling is being fearless and the other 10% is knowing when to stop and when to keep pushing forward.

Here's the back cover:


It's great how the stamping and journaling shows through after I scraped off a few layers. 


So there you have it :-)

Thanks so much for popping by.