Showing posts with label cake. Show all posts

Tuesday, January 13, 2015

Hand Carved Cake Stamp and Card Set


This year I'm going to try to be a bit better about birthday cards. I'm absolute rubbish. And Facebook made it easier to remember but I left Facebook last year so I'm right back to not.

Carving a cute new stamp seemed as good a place to start as any, no?

And this card set ensures at least four people will get cards this year. Which, sadly, will be a huge improvement.


All the cards were made the same way:

1. Stamp image on white card stock using black Staz-On ink
2. Stamp image on post it note. Cut out and use as a mask to protect the nice clean cake image.
3. Dab Ranger Distress Ink through 'stencil' with a foam cosmetic sponge - in this case the stencil was some old fancy cut out paper... KI Memories I think. Laser cut cardstock was quite a thing a few years back. Note: On the top card, I stamped a Hero Arts French Script stamp with distress ink, let it dry and then stenciled over top.
4. Add a sentiment - these are Papertrey stamps on bits of Gelli Prints.


This one was a little different, same idea but with a number laser cut, no ombre effect and I stamped the sentiment right onto the card like a ribbon.


Tuesday, February 12, 2013

Dark Chocolate and Whiskey Cupcakes: Cake # 48


Would you believe I made these last Valentine's Day and never blogged them. 
Shame on me. Let me make it right.


Dark Chocolate and Whiskey Cupcakes


For the Cake:

 2 cups all purpose flour
3/4 cup cocoa powder
2 cups brown sugar
2 tsp. baking soda
1 tsp. baking powder
1 tsp. kosher salt
2 eggs
1/2 cup strong coffee
1/2 cup Jack Daniels Whiskey
1 cup buttermilk
1/2 cup vegetable oil

Preheat oven to 350 degrees Fahrenheit.

In a large bowl, stir the flour, cocoa powder, sugar, baking soda, baking powder, and salt.


In a separate bowl, combine the eggs, coffee, whiskey, buttermilk and oil.


 Pour the egg mixture into the flour mixture and whisk until smooth. 

Spoon the mixture into prepared cupcake wrappers. Bake for about 18-20 minutes until the tops spring back when lightly pressed. 

For the Dark Chocolate Whiskey Ganache:

16 ounces good quality dark chocolate chips
3/4 cup heavy cream
2 Tbsp. butter, softened
1/4 cup Jack Daniels Whiskey


Melt and stir. 


Chill in the fridge while the cupcakes bake and cool.


Cut out centers from your cupcakes. You can use a cupcake tool or a knife. If using a knife, I recommend cutting out a cone shape - it's easier.


Give your ganache a little stir. Set aside 2 cups of ganache for the frosting.

 See how thick it set up. Yummy!


Fill the cupcake centers with ganache.


Now for the frosting. Most recipes I've seen call for even more Jack Daniels in the frosting but I tasted the cake (centers are made for snacking) with some ganache and it was PLENTY whiskey enough for my tasts. These are not subtle cupcakes folks. So I DID NOT add more JD. I stuck with plain chocolate.

Dark Chocolate Whiskey Buttercream

1 lb. butter, softened
1- 3 ounce package white chocolate, vanilla or cheesecake instant pudding mix
2 cups Dark Chocolate Whiskey ganache
1/2 cup sifted dark cocoa powder
1/2 cup heavy cream
1/2 cup powdered sugar
more whiskey to taste
Instructions:

Beat the butter and pudding mix together on medium high speed for about 5 minutes.
Add ganache, cocoa powder and heavy cream.  Beat for another 5 minutes.
Add powdered sugar a little bit at a time, to taste, and beat for at least 5 more minutes. 
(Seriously! For frosting? This is eternal!)

*Add whiskey 1 TBL at a time until you love the flavor.


Wow. Never made a frosting even close to this fluffy before. I'm impressed. Fine. 


Review: I found theses to be very strong on the whiskey flavor but the chocolate wasn't as prominent in the cake itself. The ganache and the frosting more than made up for the deficit but I like my cake to be really flavorful and the flavor was mostly whiskey. Perhaps if I'd skipped the JD in the ganache and in the frosting it would have been a bit more balanced. If you have a whiskey lover in your life these will be a huge hit.

A side note, I also found these to be a bit too oily and rich. It could be the high elevation that I bake at, or it could be all the fat in the recipe (cake, ganache and frosting is certainly 'special occasion'). Either way, when I make them again I'll be replacing half the oil with applesauce. I might fill them with something lighter too - like a custard.

Overall: I'd give them a B. It's been a year and I haven't reached for the recipe again but I have kept them in mind when I've wanted a sophisticated dessert.


Recipe adapted from several sources most of which referenced Fields of Cake.

Wednesday, June 20, 2012

Cake #47: Lemon Zucchini Loaf Cake (Healthy)

My freezer is still overflowing with zucchini from last year. I usually go through whole bushels of it making Chocolate Zucchini Cake and Brownies or Zucchini Muffin/Cupcakes *DROOL* but this year, with 52 Cakes, I didn't have as many opportunities to make our family favorites. Which means I need to use up all my gorgeous 2011 zucchini before the 2012 zucchinis make an appearance. 

This recipe makes that a task we'll all enjoy.

When I was searching for lemon zucchini cakes I found a lot of recipes, but they all had too much oil, too much sugar and not enough egg. I think rich golden egg yolks adds a ton of color, flavor and tenderness to any loaf cake. Plus, many recipes added spices - like nutmeg or cinnamon - that, in my opinion, would compete with the gloriousness that is lemon. 

I also wanted something light enough in calories and fat that I wouldn't feel bad about feeding it to my family. 

To that end, I replaced oil with apple sauce and used yogurt as the base of the liquid ingredients. In this recipe, soy or almond milk would work just as well.

The result was heavenly. Our house smelled sweet and fresh, the loaves were tall and golden and the flavor was lemony but not sour and mildly sweet, not sugary. The lemon glaze provides a nice tart counterpoint to the delicate cake. 

You may notice that my pictures are not up to par - it's because the loaves disappeared before I could even get good shots. 

My family gave this recipe full points all around and suggested I make it as often as I can.

For me, I love the ease of loaf cakes - two bowls, two pans, a whisk and a spatula. Yay for less to clean. The ingredients were inexpensive and it packed well in my husbands lunch. It's a wonderfully light recipe that's perfectly suited to hot summer days. I also love that I had enough to share. In the future when I make this it'll be one of my, 
" One to keep and one to share"
recipes. I'm sure my neighbors won't mind a bit.


Lemon Zucchini Loaf Cake

Makes two 9×5 loaves

4 cups flour (I used all-purpose but I think some whole wheat would be fine)
4 teaspoons baking powder
1 teaspoon salt
4 eggs
1/2 cup canola oil
1/2 cup applesauce
1 tsp vanilla
1 cup sugar
1 container of vanilla yogurt (I used light, fat-free)
milk to bring yogurt to 1 cup  (about 1/3 cup)
Juice of 2 lemons
Zest of 2 lemons
2 cup grated zucchini (mine was frozen from last year. I grate it with the skin on and freeze it in 2 cup bags)

Preheat oven to 350 degrees. Spray two 9×5 loaf pans with cooking spray.

Whisk together flour, baking powder, and salt.

In a separate bowl, beat eggs well, add canola oil, apple sauce, vanilla, lemon juice, zest and sugar, and blend well.

Put yogurt in a liquid measure and add milk to make 1 cup. Stir until smooth then add to egg mixture.

Mix zucchini into wet ingredients.

Add liquid ingredients to the dry ingredients and blend everything together gently; don’t over-mix!

Split batter between prepared loaf pans and bake at 350 degrees for 45 minutes, or until toothpick inserted in center comes out clean. Cool in pan 10 minutes, then remove from pan and cool completely.

Lemon Drizzle

1 cup powdered sugar
Juice of 1 lemon

Mix powdered sugar and lemon juice until well blended. Drizzle or spread glaze over cooled loaf. Let stand until set.


Friday, May 18, 2012

Cake #46: Biscoff Cake Bars


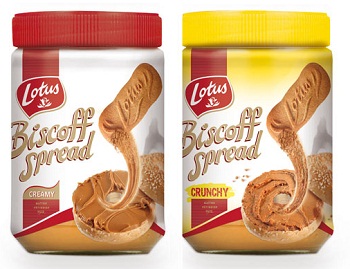
I've been hearing a lot of good things about Biscoff Spread
 all over the place so when I saw it at the grocery store I couldn't resist picking some up. What is it?

To quote Baking Bits, 
"Biscoff spread is a peanut butter-like spread made of speculoos cookies. Speculoos are buttery, brown sugar and spice-flavored cookies that are similar to gingersnaps and are popular in the Netherlands (and elsewhere). They’re traditionally served around the Christmas season. The spread is made of speculoos cookies (Biscoff brand, which are widely available) that are turned into a thick spread with the addition of sugar, vegetable oil and other all natural ingredients. The spread is smooth and creamy, with a deep brown sugar, butter and spice flavor to it. In other words, it is a spreadable cookie and it is delicious."

It was hard for me to imagine a spread made out of airplane cookies but one spoonful and I was hooked. It's smooth as can be and tastes like a cookie in spread form. It's amazing. And dangerous.

Suddenly the internet being awash in Biscoff recipes made perfect sense.

But I didn't feel like making another cupcake so I waited for something more inciting. Cue these
Gooey Biscoff Cake Bars  from over at I Love Pasta - they found the recipe at Plain Chicken... I'm not surprised this recipe gets around. It's a knock out.

On the CONS side of the ledger though you're mixing cookie spread (think nutella) with butter and sugar... it's RICH. And it'll make your house smell so good you'll forget all about swimsuit season. Trust me on this one.

I also liked how easy this was. While I usually don't  favor box cake doctoring, the yellow cake mix+butter+egg was an ideal crust and it set off the filling perfectly.


So let's get baking!

Biscoff Cake Bars

For the Cake:
1 box yellow cake mix
1 egg
1 stick butter, melted

Filling:
8 ounces cream cheese, softened
1 cup Biscoff Spread
3 eggs
1 teaspoon vanilla
1 stick butter, melted
16 ounces confectioners’ sugar

Directions:

Preheat the oven to 350 degrees F.

Combine the cake mix, 1 egg, and butter, then mix in the bowl of a stand mixer fitted with the paddle attachment. 


Press the batter into the bottom of a lightly greased 13×9 inch baking dish.


Make the filling next. In the bowl of a stand mixer fitted with a paddle attachment, beat the cream cheese and Biscoff Spread until smooth. Add the eggs, vanilla and butter, and continue beating. 


Add the confectioners’ sugar and mix well. 


Spread Biscoff mixture over the cake layer


 Bake for about 40 minutes. The center should still be gooey when it comes out of the oven. 


Let cool, then cut into squares


The flavor is out of this world. We immediately decided that it was the sort of recipe to save for something special - like Christmas - which isn't the kind of status I usually give a plain tan colored bar.

The cream cheese was really unrecognizable flavor-wise (so so says my son who hates cream cheese) it is more the base for a silky smooth, gooey, nuanced, brown sugary filling.

I cooked my bars longer then the recipe called for by about ten minutes and they were nicely set. I've since looked up this recipe elsewhere and see that most people's are very wet and gooey - mine have more structure than that and that works for our taste just fine.

These are highly recommended. I can see making them again and again - especially for an event where I can cut them in small pieces and surprise our guests with something so exquisite coming in such a drab and unassuming package.


Linked Up With:

Friday, April 20, 2012

Cake #45 Maple Pecan Cupcakes

I've been looking for a good recipe for a maple pecan cake and while a lot of them have potential, they are consistently not maple-y enough. My suspicion is that the trouble lies in using maple syrup in the batter. Recipes generally called for two cups... TWO CUPS... of maple syrup. Which is crazy, expensive and kind of gross. To add all that and still not be strongly maple-flavored seems like a waste to me. So I went with maple extract, which is very effective in providing big maple flavor. And did it ever deliver... after a half-hour or so. 

Confession: When I dreamt up these cupcakes in the bakery part of my brain I was thinking about pralines and butter pecan ice cream and how I love all things maple. Then they came out of the oven a teensy bit flat (not terrible, just not tall) and I bit into one and it tasted like a bran muffin. AAARRRGGGHHH!!!!

So I was a little annoyed. 

I ditched my plan to toast pecans for decorating, using baking tips, obsessing... and just slapped on some maple caramel frosting with a butter knife; thinking the boys will be happy enough with them regardless of how they looked. * Then I threw them in the fridge and went to do something else. 

Well, you wouldn't believe how they tasted when I bit into one a half hour later.

SPECTACULAR!
AMAZING!
JUST HOW I IMAGINED THEM!

Except now, instead of being pretty and fancy they had set up rather...er... rustically.

*sigh*

Patience is not my strong suit.

So if you want a lovely maple and pecan flavored cupcake please try these. They're a real hit with our crew and they have a lovely flavor and texture. 

And please ignore how they look :-)

Maple Pecan Cupcakes
Makes: 12 cupcakes


1/3 cup frozen pecans
1 cup milk: soy milk, skim milk, whatever you like.
1 teaspoon apple cider vinegar
1 1/4 cups flour
2 tablespoons cornstarch
3/4 teaspoon baking powder
1/2 teaspoon baking soda
1/2 teaspoon salt
1/3 cup canola oil
3/4 cup sugar
1 teaspoons vanilla
1teaspoon maple extract

I batch of caramel fudge frosting but replace the vanilla with maple extract.

Directions:

Preheat oven to 350F and line muffin pan with paper liners.


Chop the pecans in your food processor or blender.

  I was trying to get nut flour but mine started to turn into nut butter quicker then I'd hoped so I went with it. And it's delicious so... YAY! 
Chopped nuts would be great too but my kids don't like the "distracting texture". I've heard you should always add ground up nuts to your sugar to absorb the nut oils but since I was about to toss it all into a bowl, together, I didn't see the urgency.


Whisk the (soy) milk and the vinegar together and let sit a few minutes until curdled.


See, nice and chunky. Ew.


Whisk together the soy milk mixture, oil, sugar, vanilla, and maple extract.


Mix in the pecan nut bits


Sift in the flour, cornstarch, baking powder, baking soda and salt and mix until no large lumps remain. 

Now I am a lazy baker and I'm always trying to cut time out of recipes. Plus I hate making extra dishes. With all that in mind, I'm asking you to sift your dry ingredients. Yes, you can whisk them together but then you run the risk of someone biting into your luscious cupcake and getting a little pocket of baking soda. Which is gross. And that someone will be me. It always is. And I'm telling you... GROSS! So sift, it's really not a big deal.

And while we're discussing sifting, lots of recipes say to sift into your wet ingredients. Are those recipes written by octopi? I do not possess the manual dexterity to hold a sifter in one hand while scooping and measuring ingredients with the other hand while balancing the whole she-bang over a bowl of wet stuff. Not gonna happen. So do yourself a favor, grab a second bowl and sit your sifter in it. Makes life so much easier and you'll save yourself a mess.


Since this recipe is egg-free you can taste it and see how it's coming along. This batter tasted delicious and the pecans were fine enough that they didn't settle at all. 


Fill cupcake liners and bake for 20 to 22 minutes until done. 


Cool completely before frosting.


See all that gorgeous texture. Yum!


You can see the rest of our 52 Cakes HERE

*Note: I didn't chose to not decorate them because they were 'just for the kids', our family doesn't like a lot of frosting so I usually make a couple thickly decorated for my blog and the rest with a lot less frosting for us to enjoy. Since I thought I'd probably not be blogging these, I didn't make any fancy ones.

Linked Up With:
Whipperberry